Thinning edges call for a mirror check and a tension check before any bottle goes on the shelf. Rosemary water can be one small part of a scalp routine, but the research is on rosemary oil, not water, and nothing you apply will outwork a style that keeps pulling on the hairline. Use this rule: if you see a rim of fine hairs in front of a thinned band, loosen the front of your style first.
If the thinning starts at the crown, book a dermatologist.
These ten steps cover how to read your hairline, make a small batch safely, patch test it, apply it, protect your edges overnight, and track change month by month. You’ll also know which signs mean a home routine isn’t enough, and what to bring to an appointment so the visit gets you real answers.
1. Check for the Fringe Sign

Look at the pattern before you use any product. Sit by a window or under a bright lamp and use a handheld mirror to study the front and sides of your hairline.
The fringe sign is a rim of fine, short baby hairs sitting in front of a thinner, wispier band of hair. That look often goes with traction alopecia, which is hair loss linked to long-term pulling, though only a clinician can confirm it. Loss that starts at the crown and spreads outward is a different pattern, and it can be central centrifugal cicatricial alopecia (CCCA), a scarring type that needs a dermatologist.
The two can coexist, so a fringe at the front doesn’t rule out a problem at the crown. Part the hair with a comb instead of pulling it taut, because stretched hair can hide the thinning you’re trying to see. Then use a second mirror to check the crown the same way.
Comfort check: Sit in a chair with back support, rest both elbows on a table, and prop the mirror against a stack of books so your arms don’t have to hold it up.
2. Loosen the Hairline Tension

Nothing applied to the scalp regrows edges while the hairline is still being pulled. Early traction loss can recover over months once the pulling stops, while loss that has gone on for years can become permanent. That’s why this change comes before the recipe.
Tight braids, extensions, slicked ponytails, and wigs or weaves anchored at the front are ordinary styling history, not a failing. The job now is to find the style that tugs hardest and ease it. These options pull less:
- Larger-parted twists worn down, with the front section left soft
- A loose low bun with no gel slicking the edges back
- A soft twist-out with the front hairline left free
- A wig or weave anchored farther back, with a fit loose enough to slide a finger under the band
If braids are your go-to, low-tension gray braids that protect thin edges shows part sizes and weights that go easier on the front.
Ask your stylist: Request a looser install at the front, fewer or lighter pieces along the hairline, and no added extensions on relaxed hair.
3. Make Small-Batch Rosemary Water

The research people point to is on rosemary oil, not rosemary water. So think of this as something that may support a scalp routine, not something that regrows hair. Don’t add essential oil to it.
- Bring about two cups of water to a boil.
- Add a small handful of fresh rosemary sprigs, or about two tablespoons of dried rosemary.
- Reduce the heat and simmer for 10 to 15 minutes.
- Cool completely, then strain through a fine strainer or a paper coffee filter.
- Pour into a clean bottle and refrigerate.
There’s no preservative in this, so keep batches small. Discard it after about two weeks, or sooner if it smells off or looks cloudy. To make it last, freeze it in an ice cube tray and thaw one cube at a time.
Choose a trigger sprayer that’s easy to squeeze, since stiff ones tire sore hands, and a wide opening that makes refilling simple.
Maintenance tip: Put a strip of masking tape on the bottle and write the date you made it. Wash the bottle with hot, soapy water before each new batch.
4. Patch Test First

Do this step on its own, before the water goes anywhere near your scalp. Dab a small amount on the inner forearm, about the size of a quarter, and let it air dry. Write the date on a strip of tape or a bandage next to it.
Wait about 48 hours. If the skin looks and feels normal, try a small spot on the scalp before you spray the whole hairline. Wash it off and stop if you notice any of these:
- Itching
- Burning
- Redness
- Flaking
Rosemary extract is also a common preservative in shampoos and conditioners. If your skin reacts, check those labels as well, because the same ingredient could be showing up elsewhere in your routine.
Mild doesn’t mean risk-free. Essential oil is a stronger irritant than a simmered water, and that’s the reason this routine leaves it out.
5. Spray the Scalp, Skip Sore Spots
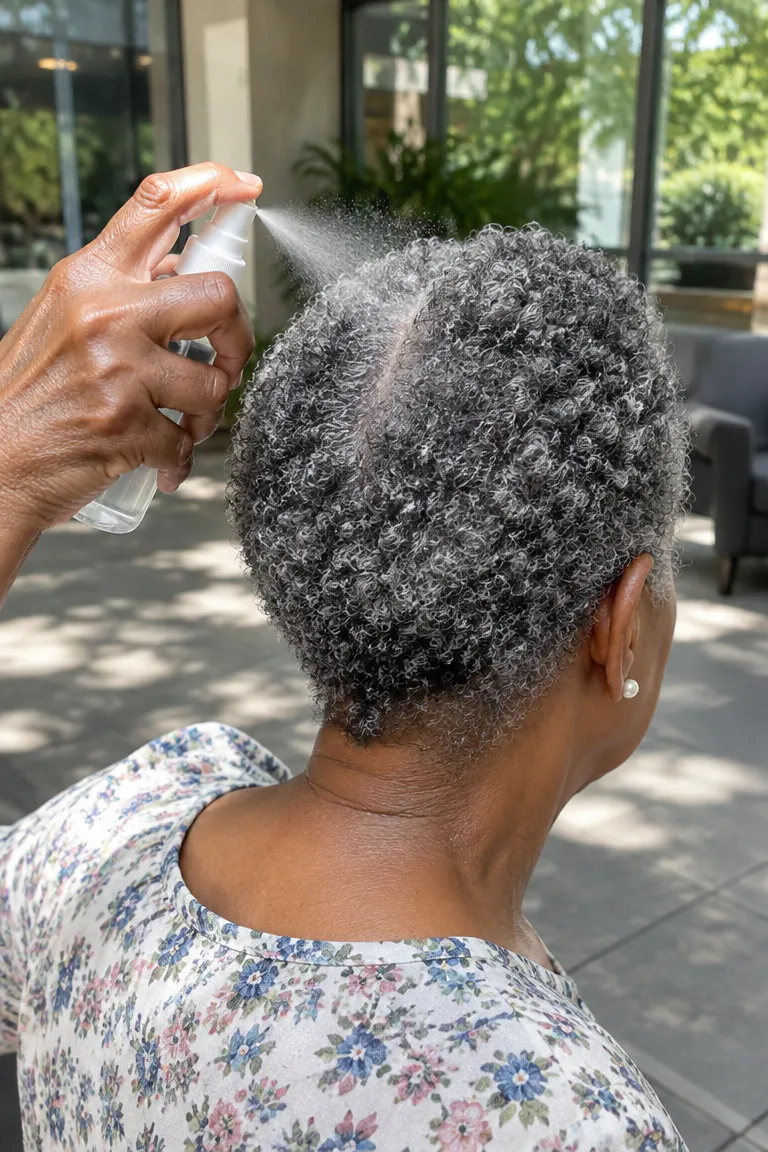
Use a comb to make a clean part along the front, then mist the skin along the hairline and across the thinning band. You’re targeting the scalp, so there’s no need to soak the strands. Move the part a half inch and repeat until the band is covered.
Pick a frequency you can keep up, such as a few mornings a week or once a day, and drop back if your skin gets touchy. That’s a routine choice, not a dose.
Skip it entirely on broken, crusted, or bumpy skin. Don’t use it over scalp pain, stinging, or pus-filled bumps either, because those need a dermatologist, not a spray.
Comfort check: Stop and rinse with plain water if anything stings. Don’t push through it and test again later; wait until the skin feels normal.
6. Use a Light Fingertip Touch
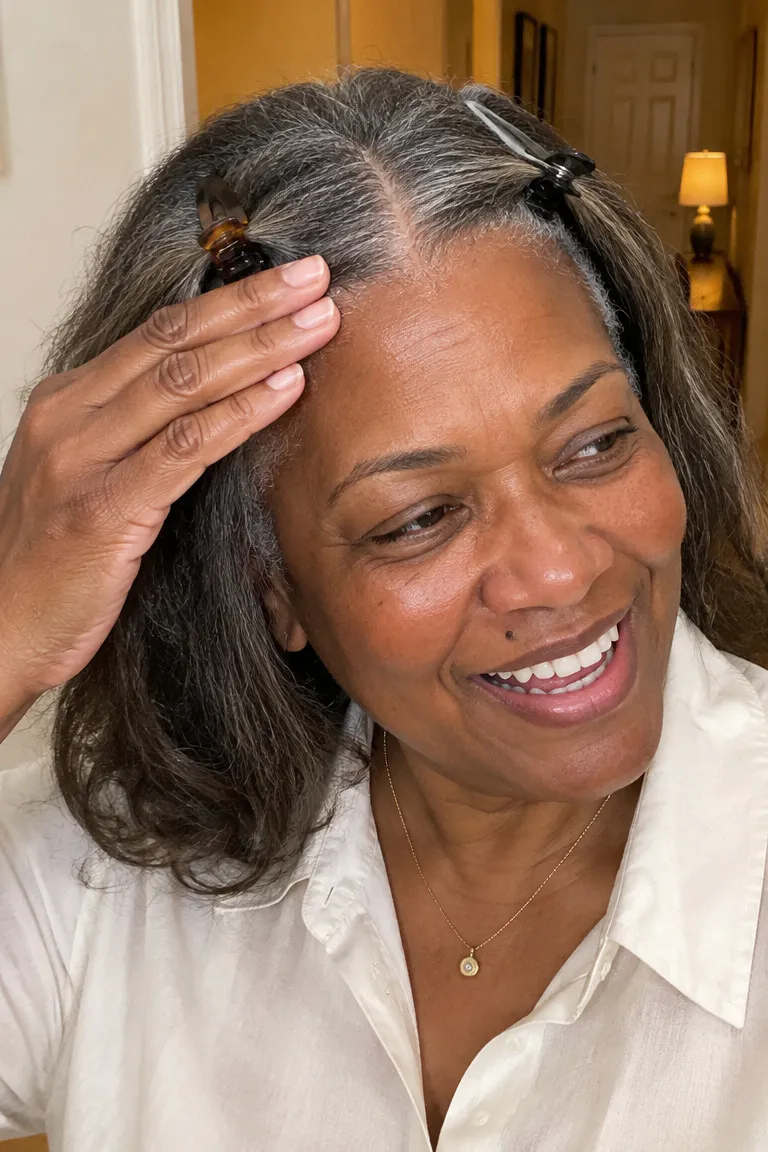
Sources don’t show that massage regrows hair. Treat this step as a gentle way to spread the water and notice how your scalp feels, such as dry, tight, or tender.
Use the flat pads of your fingertips with light pressure, and never your nails. Don’t drag along the front hairline, where fragile hairs break easily. Lift and set your fingers down instead of rubbing.
Clip the hair into small sections so you can work one at a time and see the skin as you go. Stop right away if an area feels tender.
If your hands are arthritic or tire quickly, use the flat of your fingers, not the tips, and keep sessions to a couple of minutes. A short, light pass does the same job as a long one here.
7. Check Your Bonnet Band

Silk and satin bonnets can cut down on friction while you sleep, but they don’t treat hair loss. A tight elastic band can press on the exact edges you’re trying to protect, so check the fit as carefully as the fabric.
- Look at your hairline each morning for red lines or marks left by the band.
- Choose a wide, soft edge band over a thin elastic cord.
- Pick an adjustable fit so you can loosen it at the front.
- If a bonnet still feels snug, try a satin pillowcase instead.
A mark that fades within a few minutes is less worrying than one that lingers or leaves the skin sore. Either way, loosen the fit or switch the style.
Comfort check: Lie down with the bonnet on and make sure nothing presses on the front edge. If you notice it before you fall asleep, you’ll notice it all night.
8. Keep Conditioning Existing Hair

Oils and leave-ins condition and protect the hair you already have. Dermatology reviews don’t show that they regrow edges, so choose them for softness and less breakage, not as a fix.
A light, water-based leave-in or a small amount of light oil works well. Apply it to the lengths and ends, and keep heavy product off the hairline, where buildup can weigh down fine hairs and irritate the skin. If rosemary caused a reaction, check the label on any conditioner or leave-in before you buy it.
Maintenance tip: Detangle with a wide-tooth comb from the ends up to the roots, using gentle strokes around fragile edges. Hold the hair above the section you’re combing so the tugging doesn’t reach the scalp.
9. Plan on Months, Not Weeks

The rosemary oil trial ran six months and showed no significant change at three. It also studied a different type of hair loss in a different group of people. Evidence in women over 60 is limited, so any change from a routine like this is likely to be slow and modest.
Take a photo of your hairline once a month, in the same spot and the same light, with the date written on a note in the frame. Comparing photos shows real change, while daily mirror checks tend to just make you guess. A notebook page with six dated lines works for tracking.
While you track, keep the hairline resting. Lightweight styles like natural-looking crochet braids for women over 60 are compared by weight and scalp comfort.
Set a stopping point now. If the hairline keeps receding, or nothing changes after several months, book a dermatologist visit instead of adding more products.
10. Know When to See a Dermatologist

Book the visit if you notice any of these:
- A receding or thinning hairline
- Broken or wispy hairs along a band
- Pulled patches
- Redness, tenderness, or small bumps
- Scalp pain or stinging
- Crusting or pus-filled bumps
- Hair loss that starts at the crown
- Sudden or widespread thinning
Seeing someone early beats watching the hairline for a year. A dermatologist can tell traction alopecia from CCCA, sometimes with a biopsy, and can talk through options, including minoxidil. That decision belongs in the exam room.
Bring the date the thinning started, the styles you’ve worn and for how long, the products you use, your medications, and your monthly photos.
Ask your stylist: Share what the dermatologist tells you so your stylist can adjust installs, part sizes, and tension. For shorter options, short natural styles for thinning edges are built around comfort.
Where to Start This Week
This week, do the three things that cost nothing: check your hairline for the fringe sign, take your first dated photo, and ask your stylist for a looser front. Add a patch-tested batch of rosemary water only if you want it. If the hairline keeps receding or you spot any red flag from step 10, book the appointment.